Install Qt 5 Dev Suite Windows
Windows 7/8/8.1 with Visual Studio 2013
Download and install Visual Studio Express 2013 for Windows Desktop (or Community):
http://www.visualstudio.com/en-us/products/visual-studio-express-vs.aspx
You probably want to install the stand-alone debugging tools for windows so that you can debug from within qtcreator. These tools are available from
http://msdn.microsoft.com/en-us/windows/hardware/hh852365
Download the Qt online installer: http://www.qt.io/download-open-source/
Run the installer and select where you want to install Qt. This is usually C:\Qt but can be another location as necessary by local policy (such as Desktop\Qt if you don't have install permissions on the C: drive.
The next page will offer to install the packages.
For Qt 5.5 and above select the versions appropriate for your compiler:
msvc2013 64-bit
msvc2013 32-bit
If you choose to install 5.4 and want OpenGL support you need to make sure you select:
msvc2013 64-bit OpenGL
msvc2013 32-bit OpenGL
because if you select either
msvc2013 64-bit
msvc2013 32-bit
You will get the ANGLE version and not have support for OpenGL
Configuring the debugger
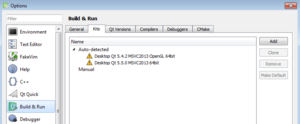
If you installed the SDK you need to configure the debugger in QtCreator. When QtCreator gets launched after install open: Tools->Options->Build & Run->Kits
Chances are the Auto-detected kit(s) will have yellow warning signs next to their names
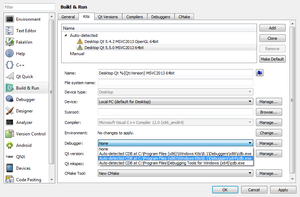
Click on the kit and find the section called Debugger and assign the appropriate debugger:
Click the Ok button at the bottom right to save your changes.
At this point you are ready to create desktop applications using QtCreator.

